Protective film must be applied continuously at production speed while maintaining consistent adhesion, alignment, tension, and surface quality. A small problem—such as dust contamination, excessive web tension, incorrect roller pressure, or mismatched adhesive strength—can affect hundreds or even thousands of finished parts before operators notice it.
For manufacturers of aluminum profiles, stainless steel sheets, coated metals, plastic panels, glass, appliances, and other finished surfaces, successful automated film application therefore depends on controlling the entire process, not simply selecting a protective film with the right adhesion.
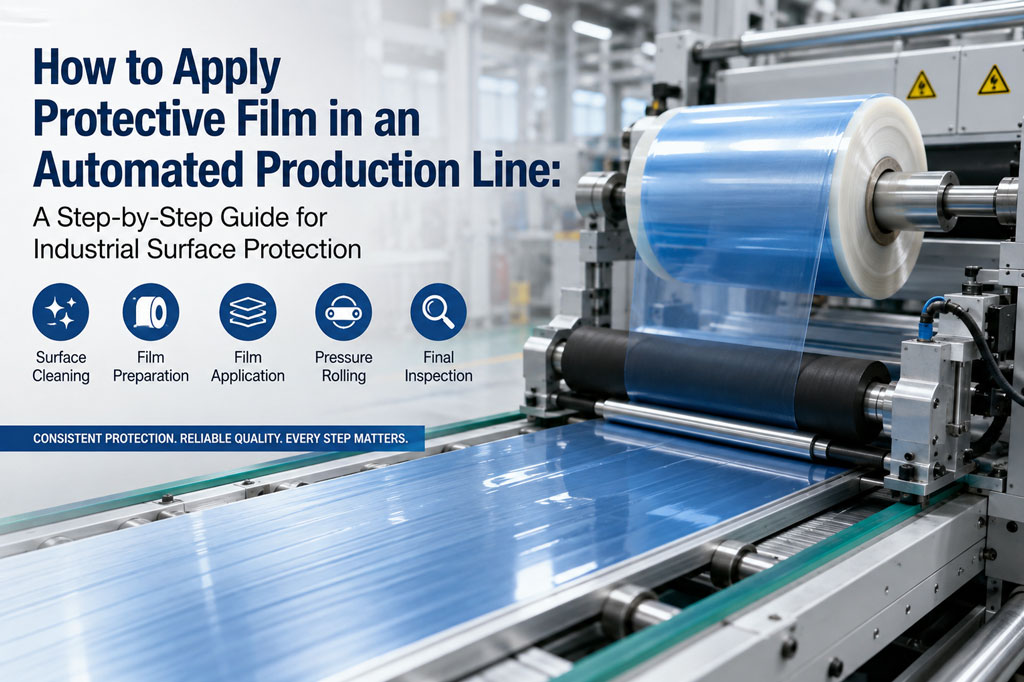
This guide walks through the industrial application process from surface cleaning and film preparation to lamination, pressure rolling, and final inspection.
1. Surface Cleaning
The first step is also one of the most underestimated.
A protective film performs best when the substrate is clean, dry, and free from contaminants. In an automated line, contamination can come from several sources:
- Metal processing oil
- Cutting or polishing residue
- Dust and airborne particles
- Fingerprints
- Release agents
- Water or condensation
- Cleaning chemical residue
Even very small particles can become trapped between the film and substrate. On highly polished stainless steel, aluminum, glass, or decorative panels, these particles may create visible bumps and, under pressure, can potentially contribute to surface marks.
Integrate Cleaning into the Production Line
Instead of treating cleaning as a separate manual operation, manufacturers can position cleaning equipment directly before the laminating station.
Depending on the substrate, this may include brushes, air knives, vacuum systems, tack rollers, or other suitable cleaning methods.
The important principle is simple:
The distance between cleaning and film application should be minimized.
If a perfectly cleaned panel travels several meters through an uncontrolled environment before reaching the laminator, dust can settle on the surface again.
For automated production, therefore, think of cleaning + film application as one continuous process.
2. Protective Film Preparation
Before installing a roll of protective film, operators should confirm that its specifications match both the protected surface and the converting equipment.
Important parameters include:
| Parameter | Why It Matters |
|---|---|
| Film width | Should match the substrate and required edge coverage |
| Film thickness | Influences mechanical protection, handling, and converting stability |
| Adhesion | Must provide sufficient holding power without making removal difficult |
| Roll length | Influences production continuity and roll-change frequency |
| Core size | Must fit the unwinding equipment |
| Winding quality | Poor winding can contribute to wrinkles and tension variation |
| Film color | Can support identification and visual inspection |
| Printing | Can carry logos, instructions, warnings, or traceability information |
Check Roll Condition Before Loading
Operators should inspect the roll for damaged edges, telescoping, deformation, contamination, or irregular winding.
This matters more in automated applications than manual applications.
A slightly damaged roll may still be usable manually because an operator continuously compensates for its movement. An automated laminator cannot make the same intuitive corrections unless suitable web-guiding and tension-control systems are installed.
3. Unwinding and Tension Control
Once the roll is loaded, the protective film is unwound and fed toward the laminating point.
At this stage, web tension becomes critical.
Too little tension can allow the film to wander, wrinkle, or fold. Excessive tension can stretch the PE or PET film during application.
This creates a particularly important industrial problem.
If a film is stretched while being laminated, it naturally wants to return toward its original dimensions afterward. The resulting residual stress can contribute to:
- Edge lifting
- Curling
- Film shrinkage
- Premature detachment
- Increased removal force
- Distortion on lightweight substrates
The objective is therefore not to make the film as tight as possible.
The objective is to maintain stable, repeatable tension with minimal unnecessary film elongation.
For higher-speed lines, closed-loop tension control, dancer rollers, brakes, load cells, and automatic web-guiding systems can significantly improve consistency.
4. Film Alignment
Before the film reaches the substrate, check its lateral position.
Incorrect alignment can result in one edge being insufficiently protected while excessive film extends beyond the opposite edge.
This becomes especially important for continuous products such as:
- Aluminum profiles
- Stainless steel coils
- Pre-painted metal sheets
- Plastic extrusion profiles
- Decorative panels
- Glass sheets
Automated edge-guiding systems can detect the position of the film and continuously correct roll movement.
The key is to correct alignment before the film enters the nip point. Trying to reposition an already adhered film creates wrinkles and uneven stress.
5. Initial Film Contact
The film should meet the substrate at a stable and predictable contact point.
The geometry of this point affects how air is displaced during lamination.
If a large section of film contacts the surface simultaneously without controlled pressure, air can become trapped underneath. Instead, the system should progressively establish contact so that air is pushed outward as the substrate passes through the laminating station.
Synchronization is also important.
The film feed speed should correspond closely with the substrate speed. Significant differences can either stretch the film or create slack.
For continuous automated lines, speed synchronization, web tension, and roller pressure must work together rather than being adjusted independently.
6. Pressure Roller Application
After initial contact, the film passes through a pressure or nip roller.
This is one of the most important stages of the entire process.
Pressure-sensitive adhesive does not normally require heat or curing to establish initial adhesion. Instead, pressure helps the adhesive establish intimate contact with the microscopic topography of the substrate.
However, more pressure does not automatically mean better protection.
If Roller Pressure Is Too Low
The film may show:
- Incomplete contact
- Air pockets
- Local lifting
- Weak adhesion
- Poor edge bonding
If Roller Pressure Is Too High
Possible consequences include:
- Unnecessary film deformation
- Excessive adhesive wet-out
- Increased removal force
- Marks on pressure-sensitive surfaces
- Increased stress in the film
- Damage to thin or soft substrates
The correct pressure should therefore be determined through application testing rather than simply maximizing the pneumatic or mechanical roller setting.
Roller Condition Matters Too
Rollers should be clean, straight, and properly maintained.
Uneven roller surfaces, contamination, incorrect hardness, or poor parallelism can produce repeating defects across every product passing through the machine.
In high-volume manufacturing, a small roller defect can quickly become a large production-quality issue.
7. Control Line Speed and Application Temperature
Protective film performance is often evaluated only by adhesive strength, but application conditions also influence the result.
Two particularly important variables are line speed and temperature.
When production speed increases, the available contact time at the nip changes. A process that works perfectly at a moderate speed may begin producing bubbles, wrinkles, or inconsistent bonding when the line is accelerated.
Temperature also affects both the film and pressure-sensitive adhesive.
Very cold substrates can reduce initial tack, while excessively hot surfaces may increase adhesive wet-out or affect dimensional stability.
For this reason, a protective film should ideally be tested under conditions that resemble the customer’s actual production environment—not only under laboratory conditions.
8. Cutting, Edge Treatment, and Downstream Processing
After lamination, the protected material may proceed directly to cutting, forming, punching, bending, stacking, packaging, or other processes.
The protective film therefore needs to survive more than the laminating operation itself.
For example, film applied to stainless steel or aluminum may subsequently experience:
- Laser cutting
- CNC machining
- Bending
- Punching
- Roll forming
- Transportation
- Installation
The correct film should remain securely attached during these processes without interfering with manufacturing.
This is why choosing protective film based only on initial peel strength can be misleading. The real question is:
Can the film maintain suitable protection throughout the customer’s complete processing cycle and still be removed cleanly afterward?
9. Final Inspection
Automated application should end with a defined inspection stage.
Operators or automated vision systems should check for:
- Wrinkles
- Bubbles
- Foreign particles
- Edge lifting
- Misalignment
- Film damage
- Incomplete coverage
- Excessive stretching
- Printing defects on printed protective film
For high-volume lines, machine-vision inspection can be particularly useful because defects can be identified immediately rather than after a full production batch has been completed.
It is also useful to retain samples periodically and perform peel tests after defined aging intervals.
A film that looks perfect immediately after application may behave differently after several days or weeks of storage.
A Practical Automated Protective Film Application Workflow
A typical industrial line can be summarized as:
Surface Preparation → Cleaning → Film Unwinding → Tension Control → Web Alignment → Initial Contact → Pressure Roller Lamination → Cutting/Processing → Visual Inspection → Packaging
Each stage influences the next.
For example, increasing roller pressure cannot compensate for a contaminated surface. Increasing film tension cannot solve poor web alignment. Choosing a stronger adhesive cannot solve every edge-lifting problem.
This systems-level view is important when troubleshooting automated protective film applications.
Common Problems and Their Likely Causes
| Problem | Possible Causes |
|---|---|
| Wrinkles | Uneven tension, poor roll winding, roller misalignment |
| Bubbles | Surface contamination, incorrect contact geometry, excessive line speed |
| Film wandering | Insufficient web guiding or unstable roll tension |
| Edge lifting | Excessive film tension, low adhesion, contaminated edges |
| Film difficult to remove | Excessive adhesion, aging, high application pressure, temperature exposure |
| Film shrinking after application | Excessive stretching during lamination |
| Dust trapped under film | Insufficient cleaning or excessive distance between cleaning and lamination |
| Uneven adhesion | Surface variation, inconsistent roller pressure, adhesive mismatch |
This highlights an important point: not every protective film failure is an adhesive problem.
Sometimes changing the adhesive simply masks a problem elsewhere in the production line.
Conclusion
Applying protective film in an automated production line is not simply a matter of putting adhesive film onto a surface. It is a controlled manufacturing process involving surface cleanliness, roll preparation, web tension, alignment, lamination geometry, roller pressure, production speed, temperature, and quality inspection.
A reliable process generally follows five fundamental stages:
- Clean the surface thoroughly.
- Prepare and correctly tension the protective film.
- Align and laminate the film without unnecessary stretching.
- Apply consistent pressure using properly adjusted rollers.
- Inspect the protected surface before downstream processing or packaging.